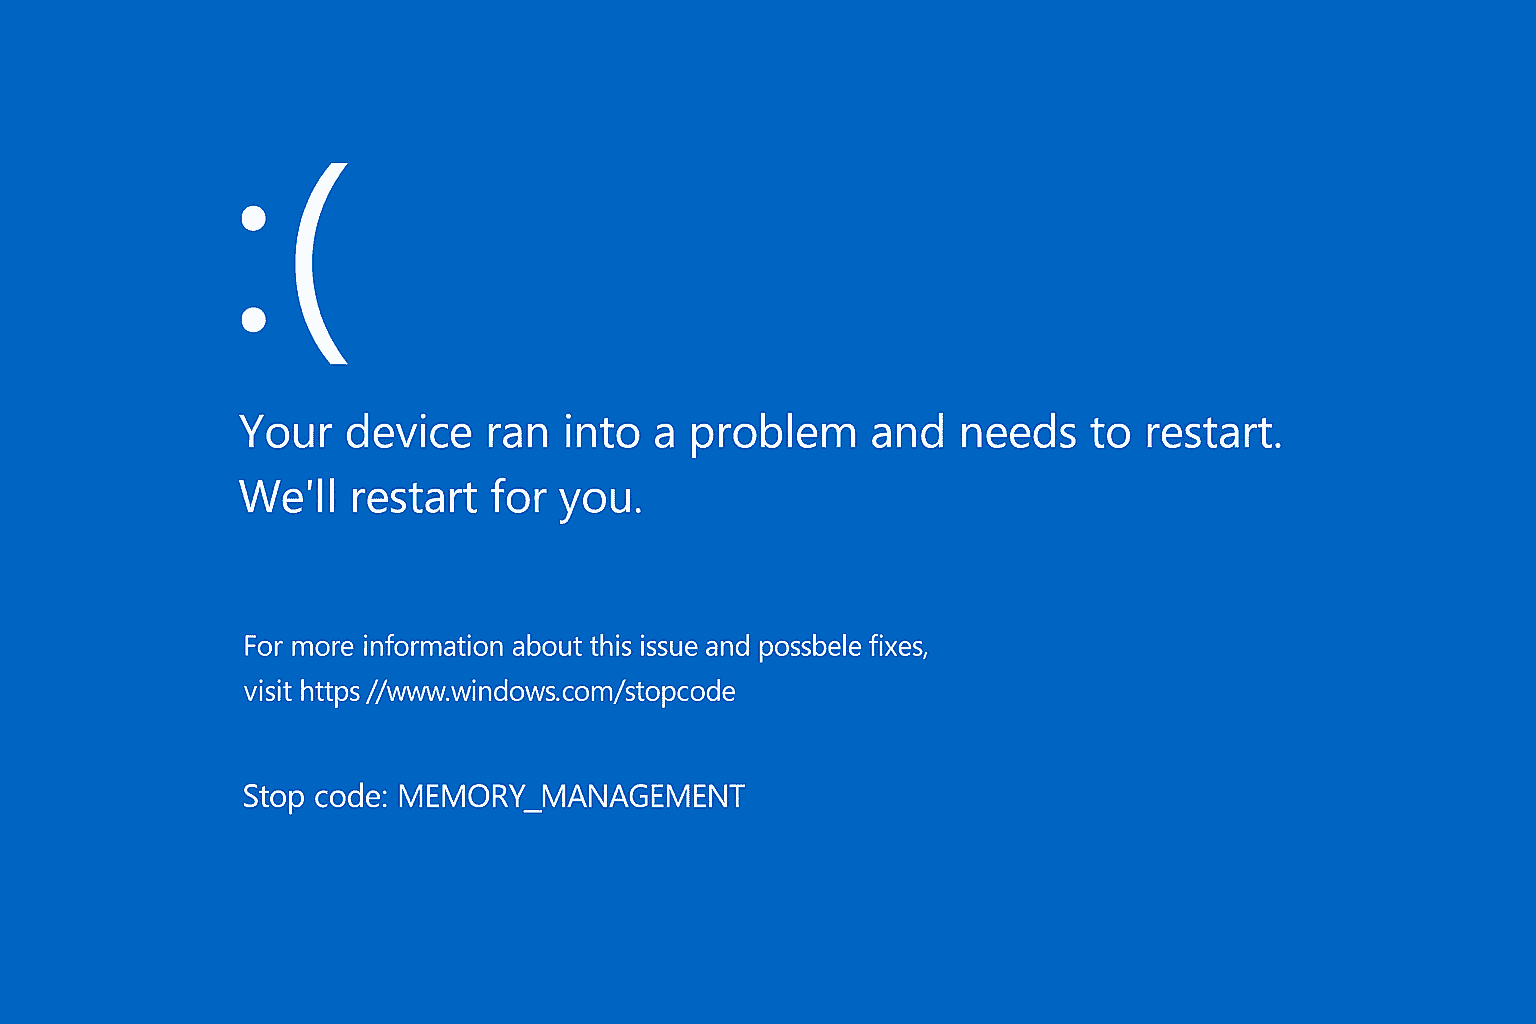
The BSOD is Windows’ way of telling you that something serious has gone wrong. Instead of limping along and corrupting files, the system stops and shows an error screen. It usually includes a stop code (like MEMORY_MANAGEMENT or CRITICAL_PROCESS_DIED) which points to the type of problem.
The good news is most BSODs can be fixed with some checks and adjustments.
Common Causes of BSOD in Windows 11
- Faulty drivers (graphic cards, network adapters, etc.)
- Corrupted system files
- Failing RAM or hardware conflicts
- Overheating or power supply issues
- Recent Windows updates gone wrong
- Malware or bad third-party software
Step 1: Note the Stop Code
When you hit a BSOD, pay attention to the stop code listed at the bottom of the error screen. This small piece of text is the key to troubleshooting.
Step 2: Boot into Safe Mode
Safe Mode loads only the essential drivers and services. This makes it easier to figure out what’s causing the crash.
- Hold Shift while clicking Restart from the Start menu.
- Go to Troubleshoot > Advanced options > Startup Settings > Restart.
- After reboot, select 4 (Safe Mode) or 5 (Safe Mode with Networking).
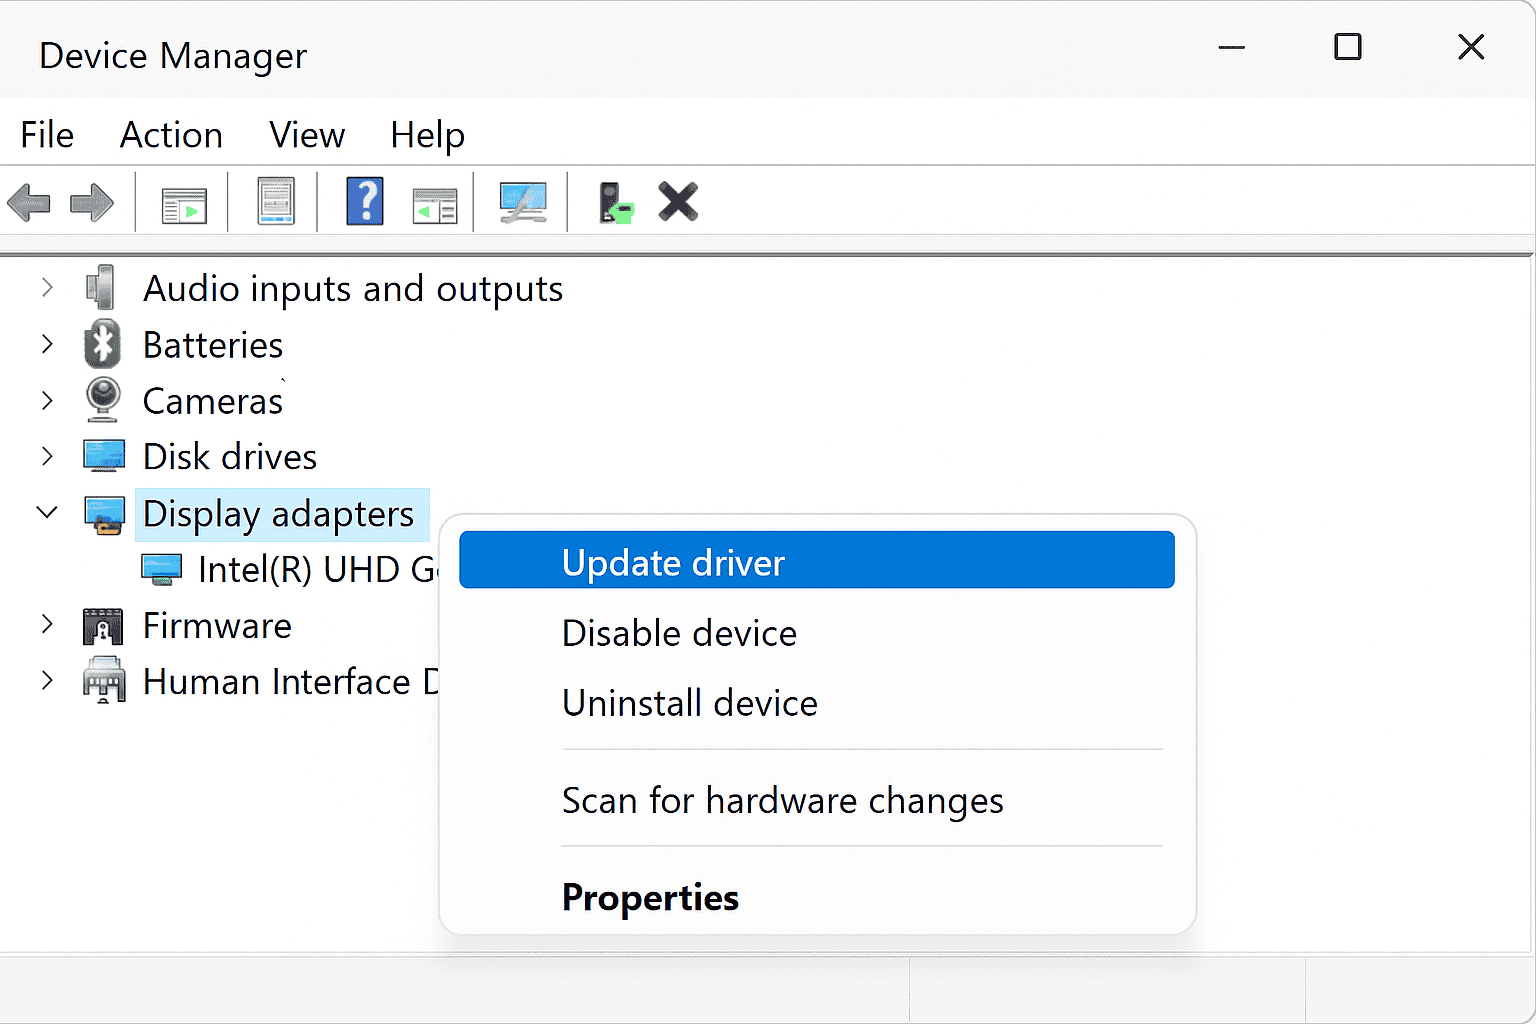
Step 3: Update or Roll Back Drivers
Many BSODs are caused by faulty or outdated drivers.
- To update:
- Press Windows + X and choose Device Manager.
- Right-click the device (like Display adapter) → Update driver.
- To roll back:
- In Device Manager, open the device properties.
- Under Driver tab, click Roll Back Driver if available.
Step 4: Run System File Checker (SFC)
Corrupt system files can lead to repeated crashes. Run Windows’ built-in tool:
- Open Command Prompt (Admin).
- Type:
sfc /scannow - Press Enter and wait while it repairs any broken files.
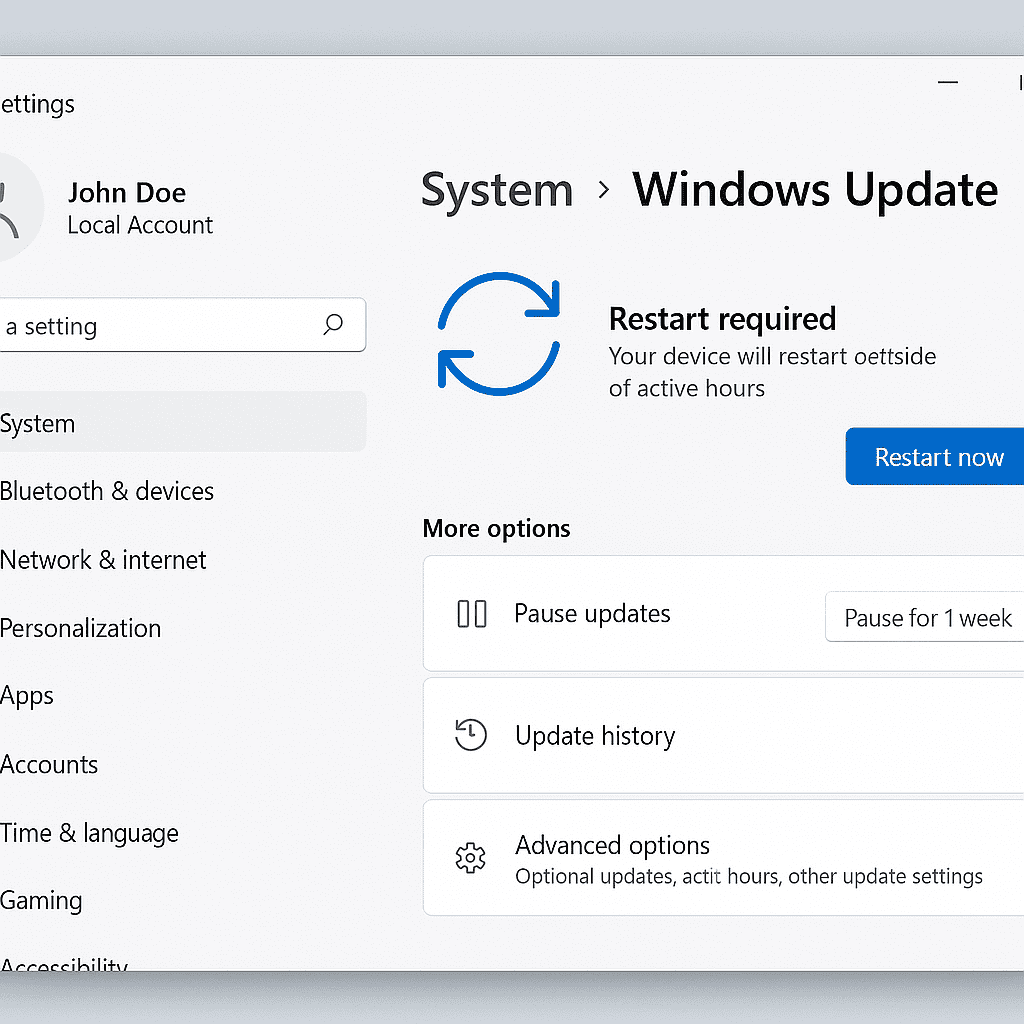
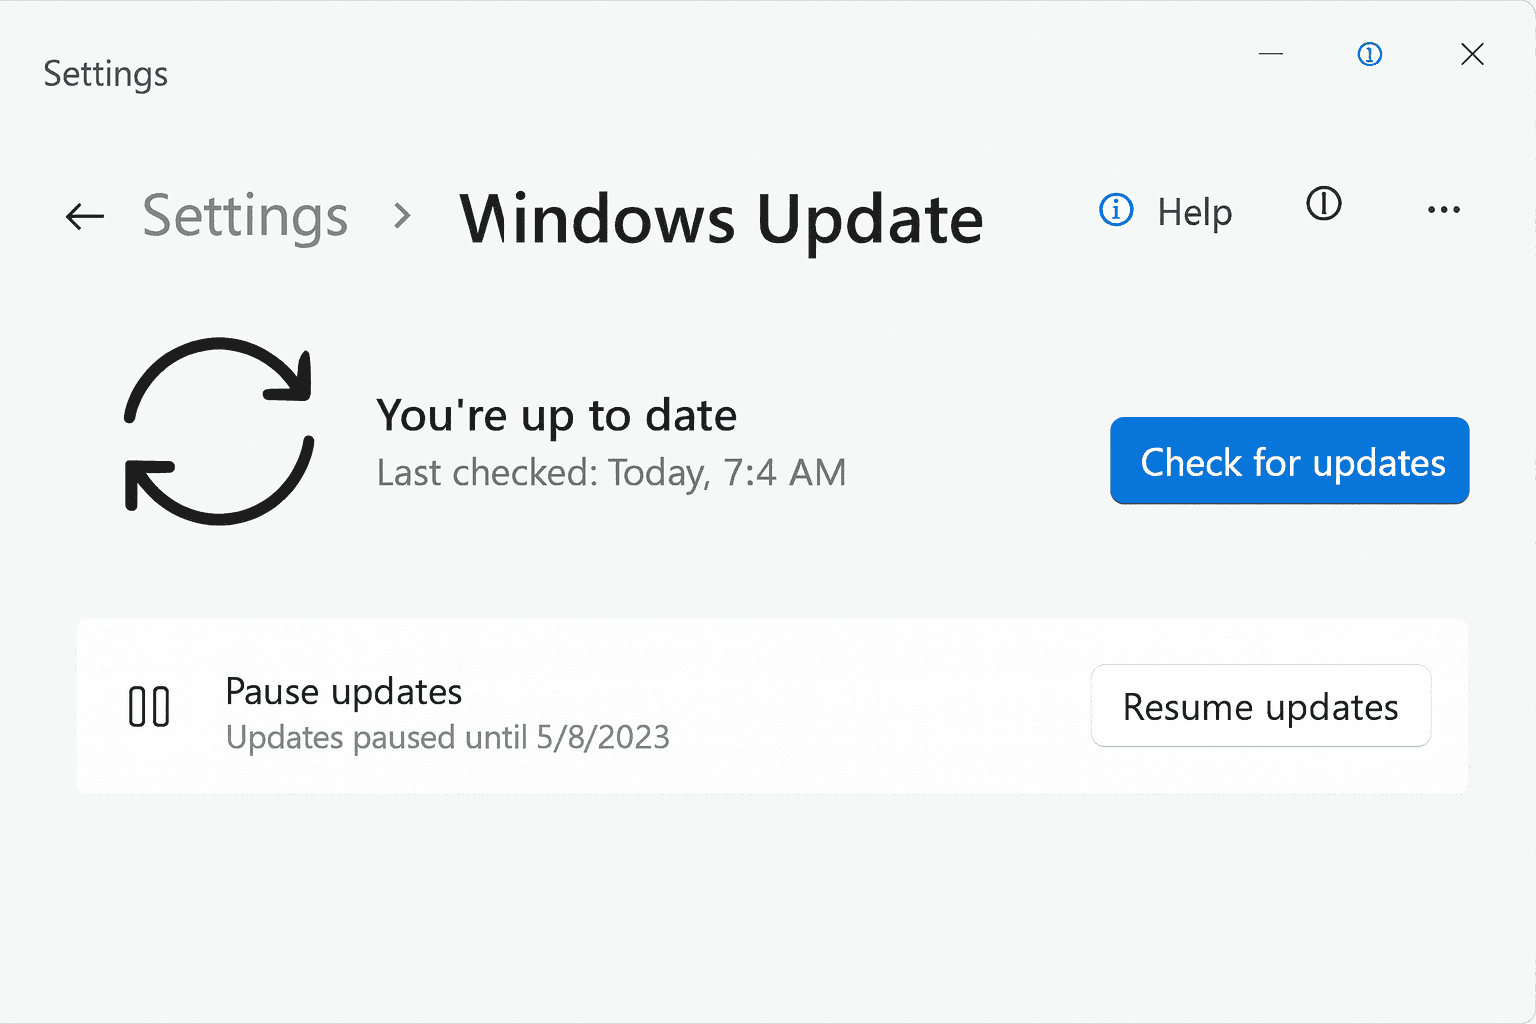
Step 5: Check for Windows Updates
Sometimes Microsoft fixes BSOD-related bugs in updates.
- Go to Settings > Windows Update.
- Click Check for updates.
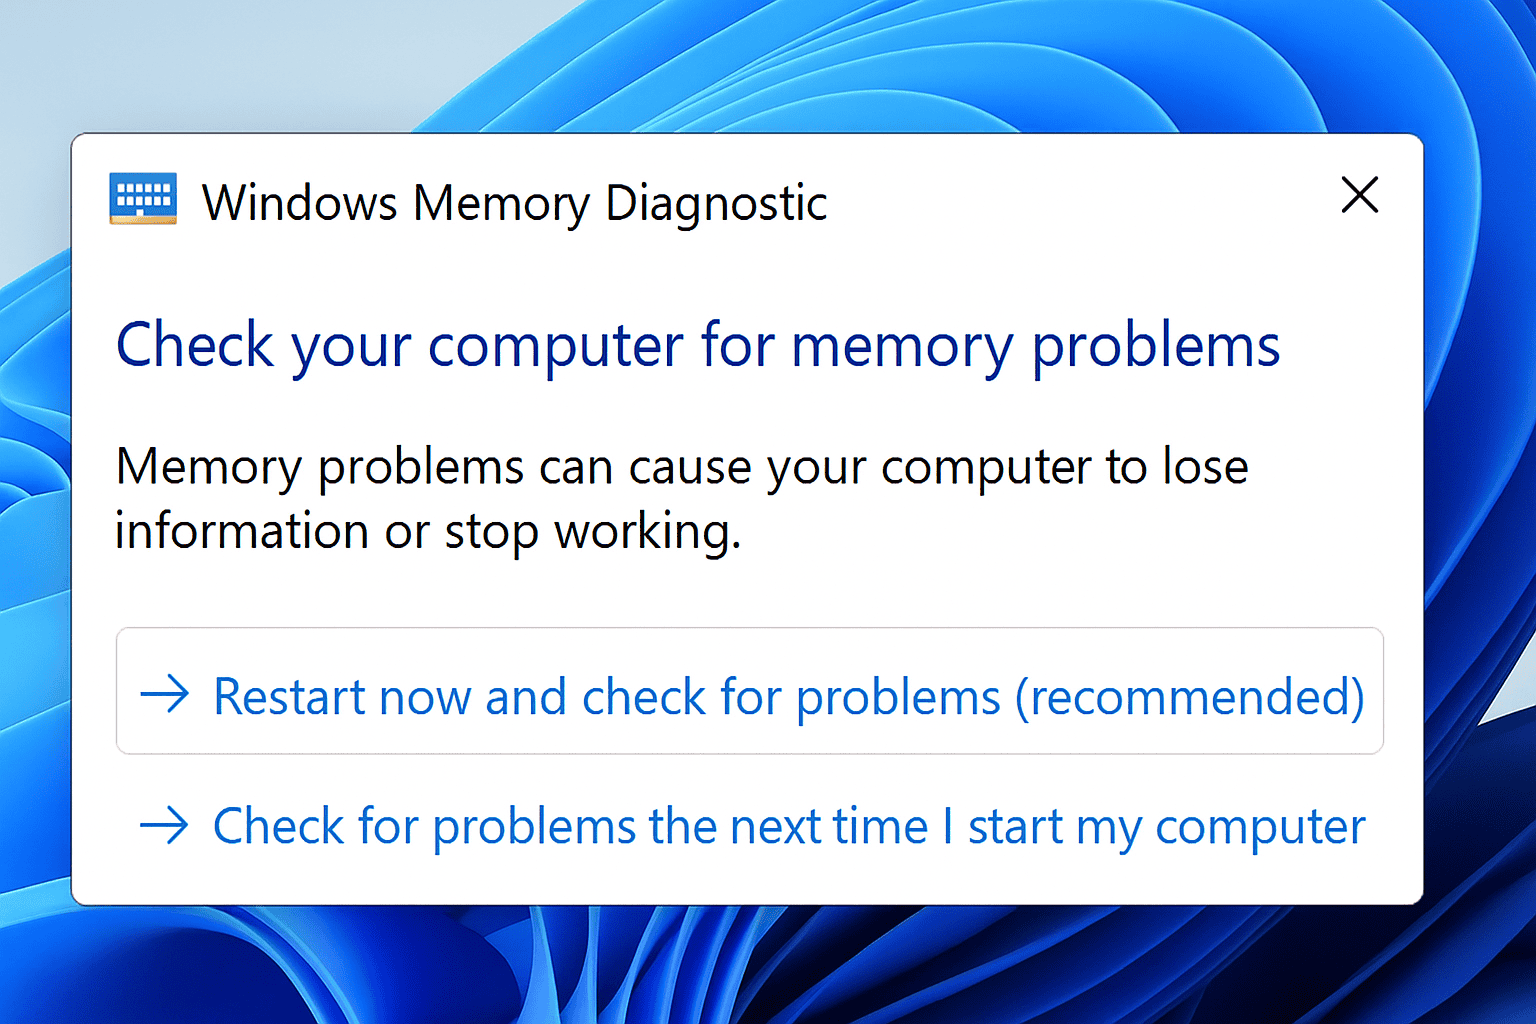
Step 6: Test Your RAM
Bad memory often triggers stop codes like MEMORY_MANAGEMENT.
- Press Windows + R, type
mdsched.exe, and hit Enter. - Choose Restart now and check for problems.
- The Memory Diagnostic Tool will scan your RAM.
Step 7: Check Your Hard Drive
Corrupt disk sectors can also cause system crashes.
Run CHKDSK from the command prompt:
chkdsk /f /r
Step 8: Remove Problematic Software
- Uninstall any new apps or antivirus tools installed just before the crashes started.
- Use Control Panel > Programs and Features to remove them.
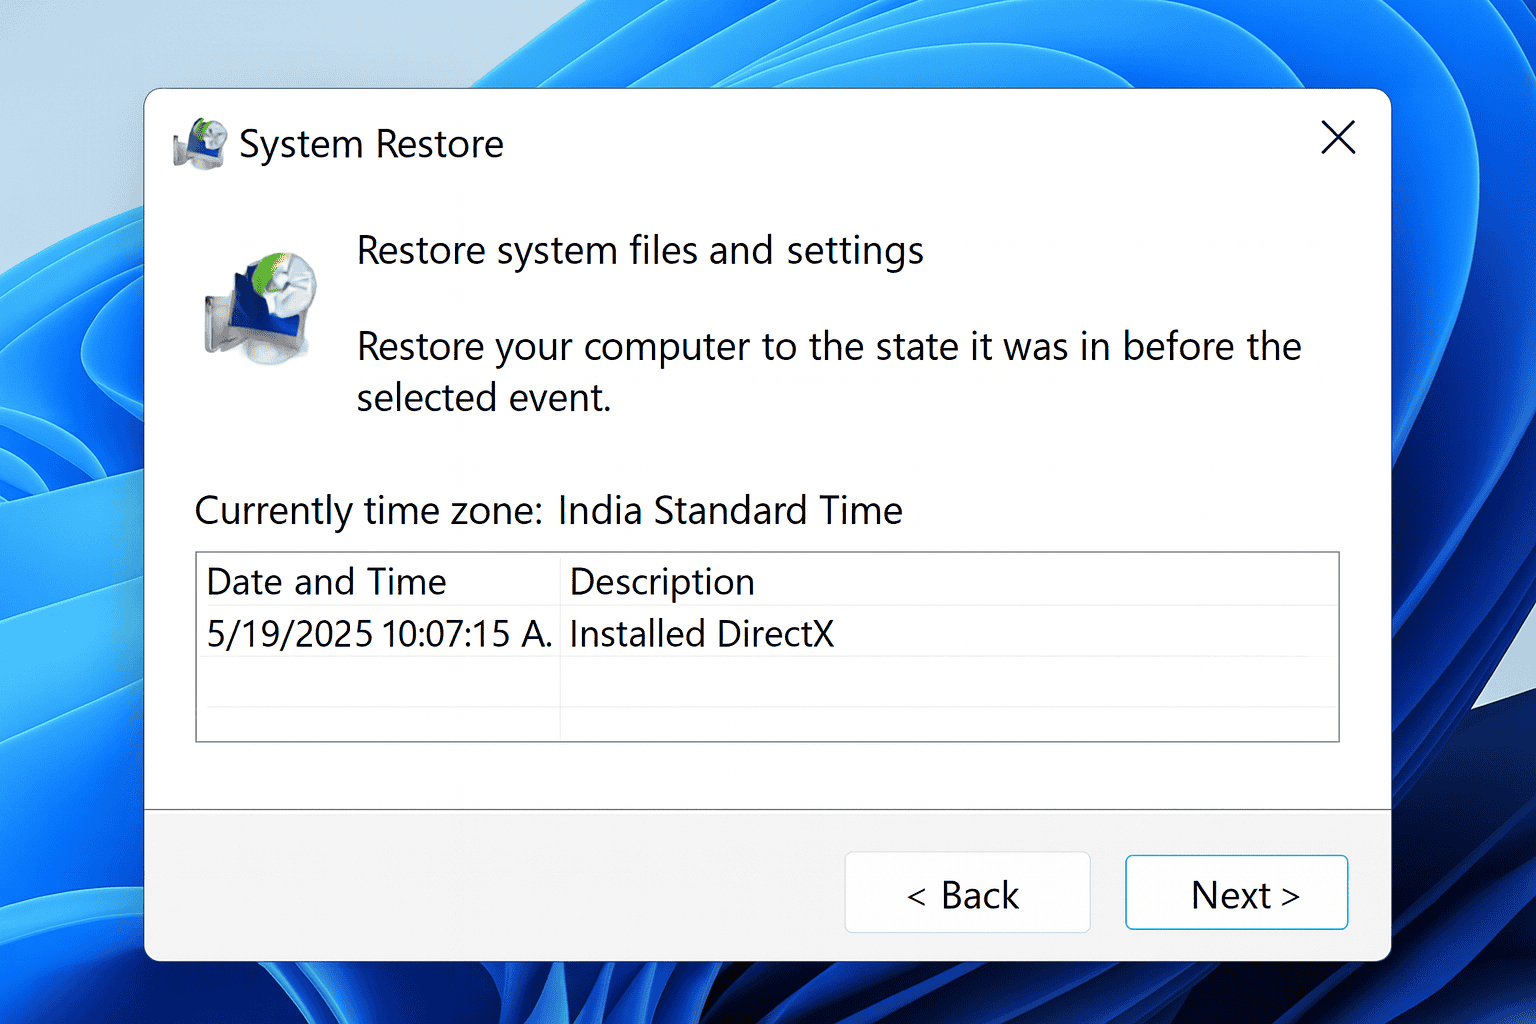
Step 9: System Restore (if all else fails)If your PC recently started crashing, you can roll it back to an earlier restore point.
- Open Control Panel → Search for Recovery.
- Choose Open System Restore.
- Pick a restore point before the BSODs began.
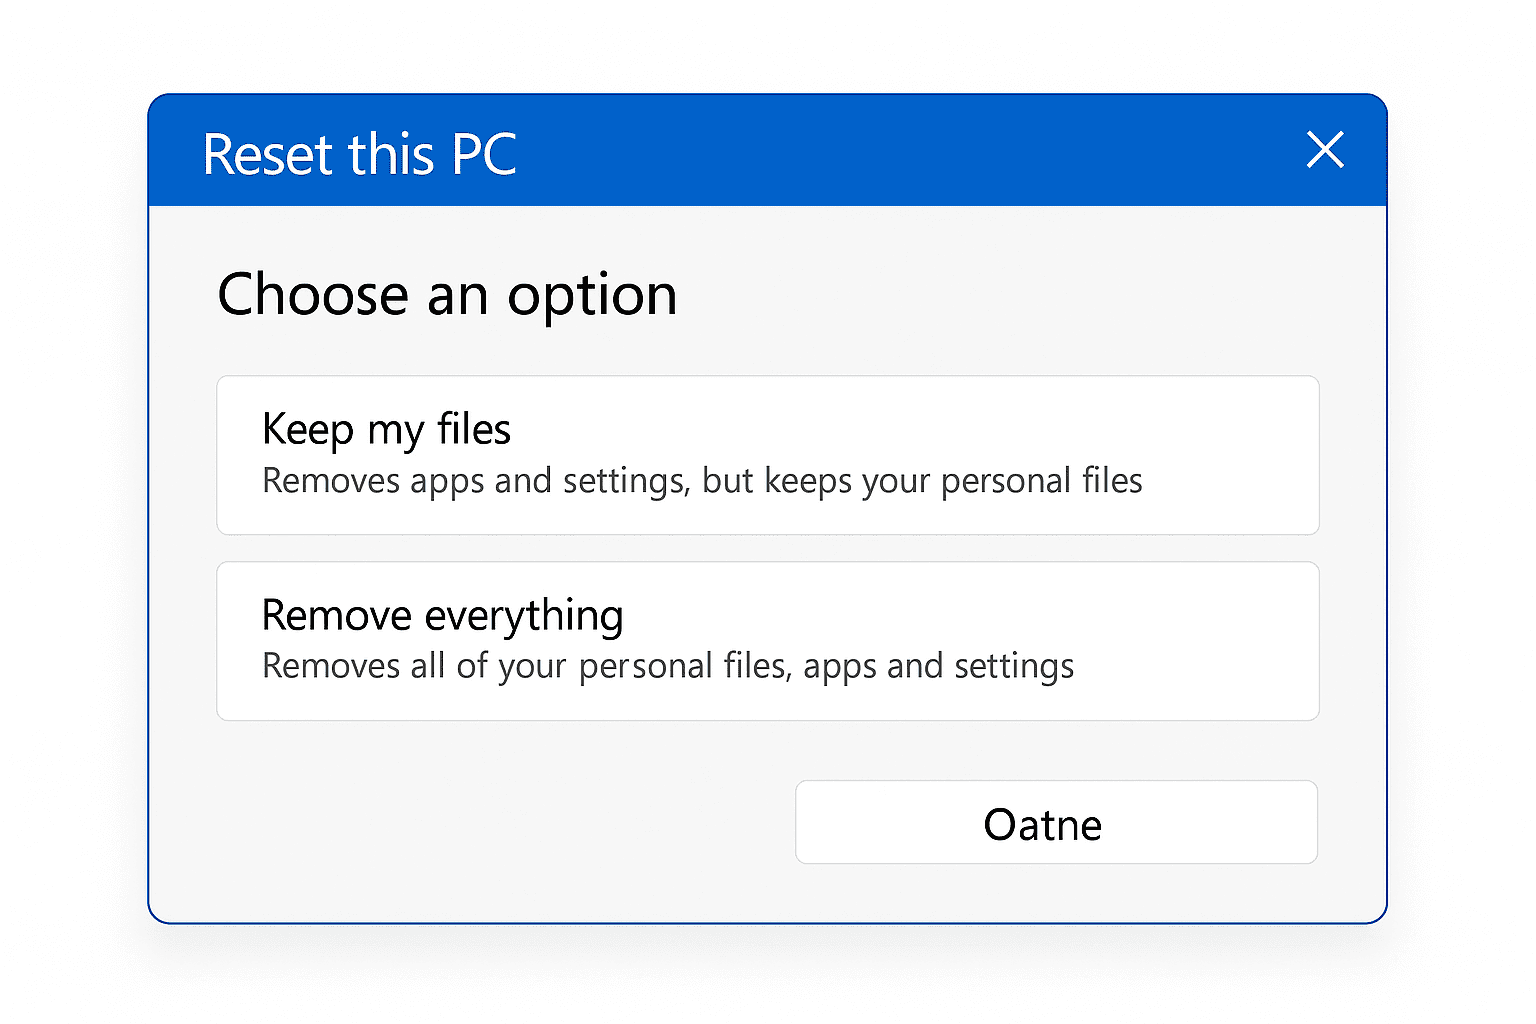
Step 10: Reset Windows 11
If nothing works, a full reset may be your best option.
- Go to Settings > System > Recovery.
- Click Reset this PC.
- Choose to Keep my files or Remove everything.
Final Thoughts
The Blue Screen of Death may look scary, but it’s really just Windows pulling the emergency brake to protect itself. Most fixes don’t require deep technical skills—just patience and careful steps.
If you’ve tried everything here and still hit BSODs, you might be facing failing hardware. In that case, it’s worth running hardware diagnostics or visiting a technician.
Remember: always back up your data regularly so a crash doesn’t become a disaster.

")


Share Your Views: